Seeds: Collection, Cleaning, Storage and Germination
One of the most enjoyable aspects of restoration is the collection of propagules for your project. After you have surveyed your site and reference sites and determined which species are most likely to have been present and which species you will spend your efforts on replanting, you have the opportunity to search for these species.
Instead of report writing and viewing scenes of ecological devastation, you have the pleasure of hiking through forests, wetlands and grasslands where you can take some time to appreciate the beauty of the world around you and perhaps enjoy new botanical/natural history opportunities.
Plant Identification
Underlying this pleasant activity though is the quest to restore a functioning ecosystem into some semblance of its previous make-up. Therefore, if you are in any doubt as to plant identification, it is best to locate promising populations with the help of an expert, preferably during the flowering season, as many vascular plants are easier to identify when they are in bloom. (GOERT flowering dates link here). You will need to receive permission to hike and collect from these areas. Identify the healthiest and most vigourous plants, these will likely produce the highest quality seeds. It is helpful to mark their locations in such a way that you can return with a great deal of assurance to the exact location and be able to identify the plants in their new, less obvious stage as seed containers. GPS units can be a huge help in locating your mother populations, but a little brightly coloured tape can be beneficial narrowing down those last few metres. It is also useful to collect or photograph representative seedheads and mount them as a learning/identification tool.
It is most important to collect propagules from within your restoration site or from the closest populations; researchers are discovering new information on species every day, some species that have been identified as a single species are in fact separate species, with different ecological preferences. Collect from the closest similar habitats at the least.
Seed Collection
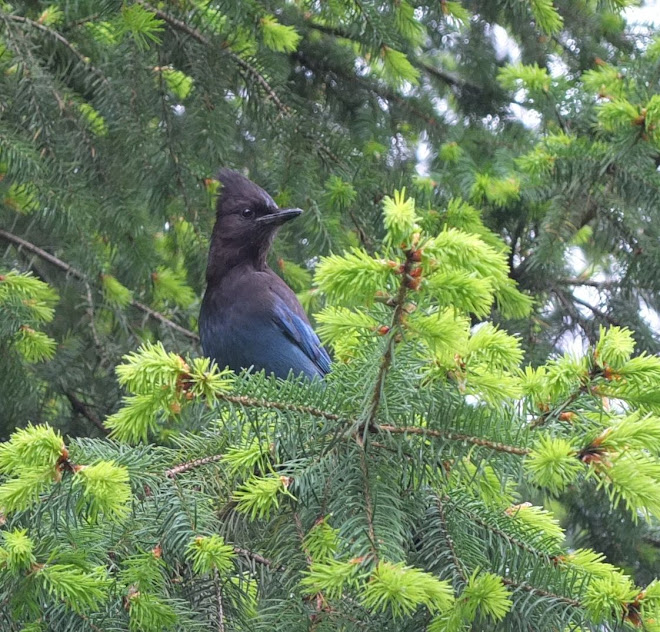
Consult with local knowledgeable sources as to the appropriate time to collect seeds (seed collection dates link), it is better to go earlier than is recommended and have to return for mature seeds than to go late and miss the seeds for the season. Many factors can influence when seeds are ripe and the quantity of seeds you might find: early and late seasonal changes, moisture and drought, browsing by predators, elevation and geographic variations, disturbance regimes, the plants’ own individual requirements and other vagaries of which we have no or incomplete knowledge. Garry oaks (Quercus garryana) are known as mast-fruiters, plants that produce acorns in abundance only irregularly, some years they are as hard to find as hen’s teeth. Combine their possible paucity with predation by band-tailed pigeons, Stellar’s jays and grey squirrels and infestation by various weevils and you can be lucky to find any suitable acorns in some years. This is not only a problem with Garry oaks, many plants are sensitive to climatic variations and have life cycles and predation rates that can make finding a good seed supply a real challenge some years. Consider when you are harvesting in lean years that you are also decreasing the quantity of seeds available for natural reproduction and for food to native species that utilize them. Also, that any one population might have been decimated for whatever reason, therefore find and mark more sites than you might think you will need.
Carry many paper and plastic (ziplock) bags and indelible writing implements when you set out on a seed collecting trip; dry days are preferable, so that you don’t have to worry about wet seedheads and additional mold problems.
Refer to ethical guidelines (GOERT ethical guidelines link here) on the amount of propagules that you should collect from species, populations and locations.
Be absolutely sure of your identifications.
Put the plant name, date, location and any other relevant information (such as recent weather conditions -dry year, wet year-, a note to try collecting two weeks earlier, later, colour, plant vigour, flavour, etc.) onto each seed packet.
When collecting, it is fine to allow some seeds to drift through your fingers onto the ground where they might eventually contribute to the gene pool.
Step lightly through these ecosystems; disturbances, especially in sensitive rocky bluffs, can facilitate the spread of invasive species.
Use paper bags when collecting dry seeds, to reduce the possibility of mold. Check to ensure that no seed eating creatures are accidentally collected with your seeds, it is very disappointing to open your containers and find only dead insects.
Soft-bodied seeds, such as berries, are better collected in plastic bags or storage containers, paper bags are too likely to become soggy and develop holes.
If you are collecting for food production, taste the berries, some have much better flavour than others of the same species and can be collected preferentially (although you will get truer (flavour/flowering/etc.) results from vegetative propagation).
Usually the largest, fattest, firmest seeds are best to use, soft-berried seeds will have lost their firmness and become soft, but not decayed. If you open the seedcoat, seed embryos should fill the embryo cavity.
Depending upon your resources, patience, abilities and amount of seed, you may clean seeds yourself or send them to a seed cleaning business (e.g. Yellow Point Propagation).
When collecting seeds from some plants species, it can be easy to clean them to a large degree as you harvest. Camas (Camassia sp), Fawn Lily (Erythronium sp) and Chocolate Lily (Fritillaria affinis) seeds are easily released from their dry shells into a paper bag. Grass seeds on the other hand, require more effort to release them from their packaging.
Directions For Cleaning Dry Seeds by Heather Koni-Pass
From Jan 2007 NPSG News: www.npsg.ca
FLUFFY SEED HEADS: (e.g.) Holodiscus discolour, Spirea douglasii.
You will need: sturdy gardening gloves, sieve of a size to allow seeds to pass through, ice cream bucket, newspaper, small plastic bags, labels.
With gloves on, take small handfuls of seedheads and rub between your hands over a newspaper to separate seeds and chaf. Then put this into sieve and sift. Save and label seeds, discard chaf.
CAPSULES & PODS: (e.g.) Penstemon, Rhododendron & Lathyrus
You will need: sturdy gardening gloves, rolling pin, large screen with mesh of size to let seeds pass through, newspaper, small plastic bags, labels.
With gloves on, put a handful of capsules or pods on screen on newspaper. GENTLY crush capsules/pods with rolling pin. Shake seeds thru screen. Save and label seeds. Discard chaf.
*With many pods which curl open when dry, it is just as easy to flick the seeds out with your fingers.
CONES: (e.g.) Alnus, Abies, Picea
You will need: face mask, paper grocery bag, sieve of size large enough to allow seeds to pass through.
When cleaning Alnus cones, wear a face mask as they can be allergenic.
Put cones in paper bag and shake vigorously. Pour bag contents into sieve and sift seeds thru. Save and label seeds. Dry on blank newsprint.
WINGED SEEDS: (e.g.) Acer
You will need: sturdy gloves, newspaper.
Wearing gloves, take small handfuls of maple keys and rub vigorously between your hands over newspaper. Winnow to separate seeds and chaf.
WINNOWING: (e.g.) Poa family
Sometimes, when separating chunkier seeds from chaf, better results are obtained by winnowing the seeds and chaf. It is easiest to work at a large table.
You will need: broom, dust pan, large plastic sheet to cover table, newspaper to cover plastic, fan, 2 deep buckets of same height, ice cream bucket.
Cover table with plastic. Cover plastic with newspaper. Place one deep bucket at end of table, upside down. Stand fan on this bucket with head in fixed position, facing down the length of the table. Turn fan on to low speed. Hold your hand in front of the fan so you can judge where the airflow is not too strong. Position the other deep bucket, right-side up, at this point in front of the fan.
Put the seeds and chaf in the ice-cream bucket. This will be trial and error. Holding the ice-cream bucket above the deep bucket, slowly pour a little of the contents into the deep bucket. If positioning is correct, the heavier seeds will fall into the deep bucket and the chaf will blow onto the table. If the air current is too strong and everything blows onto the table, simple scoop up the mixture, move the deep bucket a little further away from the fan and try again. With some experience, it becomes easy to judge the distance from the fan.
NUTS: (e.g.) Quercus & Corylus
You will need: seeds, bucketful of water, two screens of same size with two pieces of black landscape cloth to match screens, weights or clamps to hold screens together…and later, 1 gal. pots full of leafy compost.
Put all seeds in bucket of water and soak for a while (overnight is good). Seeds that sink are viable. Throw the floaters away where critters can eat them. This will also drown any worms in the seeds. Put a layer of landscape cloth on a screen. Spread seeds on this. Lay second layer of cloth over seeds. Put second screen on top. Weigh or clamp all together so seeds don't become critter snacks. Put this package on table in greenhouse or in shady spot outdoors. Water 3-4 times daily. As seeds sprout, transfer to pots of soil, ensuring that soil is gently tamped down while not damaging the sprout. Put one seed per pot. Water pot to ensure good contact between soil and seed. Continue to water regularly. Seedlings will remain in this pot until sold or ready to plant out carefully, taking care to not damage the root.
If you have only a handful of seeds, sprouting can be done in a canning jar with screen on top, as if sprouting seeds. The cupboard under the kitchen sink is a good, dark, warm spot.
Directions For Cleaning Soft-Berried Seeds by Heather Koni-Pass
From May 2006 NPSG News: ww.npsg.ca
EQUIPMENT:
Waterproof apron, water source at work table, several buckets, food processor, duct tape, large sieve, clean stir stick, several clean-up rags, fine-meshed screens, clean newspaper, fan, small plastic flower pots
• Put one or two layers of duct tape on blades of food processor; one for small seeds (Rubus-raspberries) and two for larger seeds (Oemlaria-Indian plum).
• Put a small amount of berries in the food processor, fill with cool water.
• Holding hand over spout, pulse several times until a slurry forms.
• Fill a bucket ½ full of cool water. Pour slurry into bucket of water and swirl around. Unviable seeds and berry mush will float to the surface. Viable seeds will sink to the bottom of the bucket. Set sieve over another bucket.
• Slowly pour swirling water through sieve, stopping before the clean seeds are poured out of the first bucket. If cleaning fine seeds, line a screen with clean newspaper. Omit newspaper for large seeds. Retrieve clean seeds from first bucket and spear on screen.
• Examine stuff in sieve. If you feel there are enough seeds remaining in slurry dregs, repeat processing.
• Repeat this process until all fruits are seeded.
When you have completed the screening process put the screens of cleaned seeds in a well-ventilated space to dry. Stand a flower pot under each corner to ensure good ventilation. Cover with a second screen so they don’t become mouse treats! Stir gently several times a day while drying. Running a fan in this area will help the drying process.
If seeds stick together while drying, simply rub through your hands occasionally to separate. Plant out or store in fridge/freezer.
Some native plant with soft-berried seeds/husks:
Amelanchier alnifolia-saskatoon; Arctostaphylos uva-ursi-kinnikinnick; Cornus canadensis-bunchberry; Cornus stolonifera, red-osier dogwood; Crataegus douglasii-black hawthorn; Elaeagnus cummutata-wolf willow; Gaultheria shallon-salal; Juniperus communis-common juniper; Lonicera spp-honeysuckles; Mahonia spp- Oregon grapes; Oemleria cerasiformis-Indian plum; Rhamnus purshiana-cascara; Ribes spp- currants; Rosa spp-roses; Rubus spp-raspberries; Sambucus spp-elderberries; Sorbus spp-mountain ash family; Symphoricarpos spp-snowberries; Vaccinium spp-huckleberries
Seed Storage
from: www.jvk.net/pdf/drk_seed_storage_and_handling.pdf
Check the GOERT (and other) propagation guidelines (propagation guidelines link) for information on storage times. Some species will keep for decades and others for only months or a few years, with decreasing germination success as time goes by.
Generally speaking, seeds should be dried to 5-8% relative humidity (RH) and then stored at 5ºC to retain optimum seed quality. Seed quality will be affected when moisture content falls below 5% RH (vigour declines) or above 8% RH (seed deterioration); above 12% RH and fungi can grow. Refrigerators are the right temperature for seed storage but have approximately 40% RH. To ensure proper drying, seal the seeds in a jar (wide mouth canning jars work well) with a desiccant such as silica gel (can be purchased at scientific supply stores), the amount of silica gel should equal the weight of the seeds. Some silica gel comes as a coloured product, a pink or red colour means the product is still working, when it turns blue, it has ceased to be useful; it can be reinvigorated by heating to 110-180ºC. It’s helpful to be able to see if your seeds are still being stored at the right RH.
When you cannot find silica gel, powdered milk, tied in a small breathable fabric such as cheesecloth, is a satisfactory substitute. Small seeds will dry sufficiently overnight while larger seeds might take several days. Now the seeds can be stored, in their sealed jars, in the fridge.
If you open dried seed packets to sow and leave them unsealed for several hours, they will increase their moisture content rapidly, you will need to dry them again to ensure continued vigour and viability.
Some seeds have short life spans and can only be stored a short while. Garry oak acorns should be planted almost immediately and kept cool and moist until planting, they won’t tolerate being dried out. They also benefit by being soaked for a number of hours, discarding any that float, or which have insect damage, these have either not developed fully or are infested with pests and will not germinate. Weevils, like rats fleeing a sinking ship, will vacate soaking acorns and drown, these acorns should also be eliminated.
Seed Germination
In order to propagate plants at our convenience, it can be necessary to artificially induce the germination process.
Some seeds germinate with great ease, Roemer’s fescue (Festuca roemeri) is only too willing to germinate. Carefully measure one to two seeds into each planting cavity (styro block size 144), lightly sift potting soil mix on top, water, place in a warm, bright location and germination will occur rapidly.
Scarification
Some seeds, including many tree and shrub species, have hard seedcoats that have evolved for protection and they are naturally disinclined to germinate unless they have been subjected to extensive modification. In their natural environment, they might sit for one, two, or more seasons until their seedcoats have deteriorated and thinned enough to allow moisture and air to begin the germination process. Manzanita (Arctostaphylos columbiana) and Kinnikinnick (Arctostaphylos uva-ursi) are two such species that can be forced into an earlier germination by various means. Mechanically, the seeds can be gently rubbed with sandpaper or a nailfile, nicked with a sharp implement or cracked with a hammer; chemically, they can be immersed in a sulfuric acid bath for various lengths of time (check propagation techniques), vinegar can be used more safely but with less successful results; or they can be covered with boiling water and let sit until the water has cooled. Whichever method is used, it is important to open the seedcoat without harming the embryonic plant. Scarified seeds do not store as well.
Stratification
Many seeds need stratification, which involves manipulating the seeds’ environment; providing moisture, cold and heat as if it has undergone seasonal changes. Saskatoon (Amelanchier alnifolia) will germinate after a cool moist stratification period: place in a plastic bag with slightly moistened peat moss, refrigerate for 3 months, plant. Alternately, plant the seeds directly into their container and leave outdoors for the winter. Snowberry seeds (Symphiocarpos albus) are more particular, they first require a warm, moist 60 day period of stratification, followed by 180 days of cool, moist storage before planting. Check the seeds regularly as they stratify to monitor for signs of mold or dryness.
Some seeds need both scarification and stratification to germinate, check propagation guidelines for individual species’ requirements.
Whether for large scale production or your own satisfaction, proper seed collection, storage and germination technique is an important consideration in any project. Enjoy the process!
January 2010
Friday, January 15, 2010
Subscribe to:
Posts (Atom)

